
Music has the power to move our souls and stir our emotions, and the acoustic guitar often takes center stage in creating those beautiful melodies. But have you ever wondered how to make your acoustic guitar sound its best? That’s where the magic of EQ, comes into play. In this simple guide, we’ll unlock the secrets of how to EQ your acoustic guitar, empowering you to achieve the perfect sound that resonates with your music and your audience.
Whether you’re a seasoned musician or just starting your musical journey, understanding how to EQ your acoustic guitar can be a game-changer. EQ is not reserved for the studio engineers alone; it’s a tool that every musician should have in their toolkit.
Importance of How to EQ your acoustic guitar
One of the primary reasons to master acoustic guitar EQ is to enhance your instrument’s natural characteristics. Every acoustic guitar has its unique timbre and tonal qualities. EQ allows you to accentuate the bright, shimmering highs, boost the warm and resonant midrange, or add depth to the low-end frequencies. By tailoring the EQ settings, you can make your guitar sound richer, fuller, and more balanced.
Moreover, EQ helps you cut through the mix when playing in a band or recording. It allows you to carve out a sonic space for your guitar, ensuring that it stands out without overpowering other instruments. This balance is crucial for achieving a cohesive and professional sound in any musical context.
Musicians and producers often find themselves at a crossroads. Some prefer to take on the mixing and mastering tasks independently, while others lean towards seeking the expertise of seasoned mixing and mastering engineers. Engaging a professional to EQ your acoustic guitar in a song during the mixing and mastering phases is crucial for attaining a polished and top-tier sound quality. Whether you decide to manage the mixing and mastering yourself or opt for professional assistance, Fiverr provides a convenient platform where you can connect with skilled audio engineers who have the know-how to help you achieve the finest possible sound for your music.
Preparing Your Acoustic Guitar
When it comes to achieving the perfect sound for your acoustic guitar through EQ, it’s crucial to start with a well-prepared instrument. Proper preparation ensures that you’re working with a clean slate, allowing your EQ adjustments to shine. Here are some essential steps to prepare your acoustic guitar:
Tuning Your Guitar
Before diving into EQ adjustments, make sure your guitar is perfectly tuned. Proper tuning ensures that you’re working with accurate pitch and harmonics. Use a reliable tuner to achieve precise tuning, and be meticulous about it. Even minor tuning discrepancies can affect the overall EQ process.
String Maintenance
Check the condition of your guitar strings. Old and worn-out strings can produce a dull and lifeless sound, which can make EQ adjustments less effective. Consider replacing your strings if they are showing signs of wear or corrosion. Fresh strings can significantly improve your guitar’s tone.
Action and Neck Adjustment
Assess the action of your acoustic guitar, which refers to the distance between the strings and the fretboard. A high action can lead to intonation issues, making it challenging to achieve a balanced EQ. Ensure that your guitar’s neck is properly adjusted and the action is set to your liking.
Clean Your Guitar
Dust, dirt, and residue can accumulate on your guitar’s body, affecting its resonance and tone. Regularly clean your guitar to keep it in optimal condition. Use a soft cloth to wipe down the body, and consider using appropriate cleaning products for the fretboard and other components.
By taking these steps to prepare your acoustic guitar, you lay a solid foundation for the EQ process. A well-maintained and properly tuned instrument will respond more effectively to your EQ adjustments, allowing you to shape your desired sound with greater precision.
Step-by-Step Acoustic Guitar EQ Guide
Now that you have a well-prepared acoustic guitar and a basic understanding of EQ, let’s dive into a step-by-step guide on how to EQ your instrument effectively. Follow these simple steps to get the best out of your acoustic guitar’s sound:
1. Setting a Flat EQ Curve
Begin with all EQ bands set to their neutral, or flat, positions. This means no boosts or cuts to any frequencies. This step provides you with a clean starting point from which to work.
2. Making Subtle Adjustments
Start by making subtle adjustments to the EQ bands. Listen carefully as you make changes, and pay attention to how each adjustment affects the guitar’s tone. Here’s a basic guideline:
- Bass (Low Frequencies): If your guitar sounds boomy or muddy, reduce the bass frequencies. Conversely, if it lacks warmth, add a slight boost.
- Midrange (Mid Frequencies): Adjust the mids to bring out the guitar’s character. Cut mids for a cleaner sound or boost for more presence.
- Treble (High Frequencies): Adjust the treble to control brightness. Cut treble if your guitar sounds too harsh or boost for more sparkle.
3. A/B Testing
Compare the EQ-adjusted sound with the flat EQ sound by toggling the EQ on and off. This A/B testing helps you gauge the impact of your adjustments. Make incremental changes and refine your settings until you achieve the desired tone.
Remember that the extent of your EQ adjustments will depend on your guitar’s specific characteristics and the sound you’re aiming for. Don’t be afraid to experiment, and trust your ears throughout the process.
Troubleshooting and Tips
Even with careful EQ adjustments, you may encounter some common challenges along the way. Here are some troubleshooting tips to address these issues:
Muddiness or Boominess:
If your acoustic guitar sounds muddy or boomy after EQ adjustments, try the following:
- Reduce bass frequencies (lower frequencies).
- Cut the low-mid frequencies slightly.
- Experiment with the midrange to bring out clarity and definition.
Harshness or Brightness:
If your guitar sounds too harsh or bright, consider these remedies:
- Reduce treble frequencies (higher frequencies).
- Cut high-mid frequencies if needed.
- Adjust the midrange to add warmth and balance.
Feedback Issues
If you’re experiencing feedback problems, especially in live settings, try these solutions:
- Use a feedback buster or soundhole cover to minimize unwanted vibrations.
- Be mindful of your proximity to the amplifier or monitor speakers.
- Experiment with notch filters to target and reduce specific feedback frequencies.
Recording Considerations
When recording your acoustic guitar, keep the following tips in mind:
- Use a high-quality microphone and position it properly.
- Experiment with mic placement to capture different tonal characteristics.
- Apply EQ adjustments sparingly during post-production to enhance the recorded sound.
Remember that practice and experimentation are key to mastering the art of EQ for your acoustic guitar. Each instrument is unique, and your preferences may evolve over time, so don’t hesitate to fine-tune your EQ settings to suit your musical style and context.
Top 3 Best EQ plugins for your acoustic guitar
1. smart:EQ 3
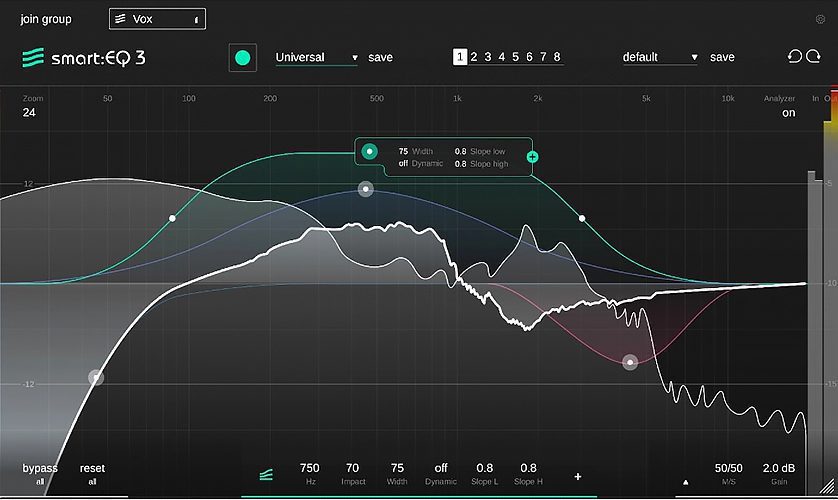
The smart:EQ 3 enhances detail, clarity and transparency in single tracks and in arrangements of up to six channels. Where things get smart is with the so-called smart:filter. This uses AI techniques to analyze the incoming audio, then creates an additional EQ curve that aims to correct any tonal imperfections, basing these calculations on a chosen profile. Unlike other AI EQ’s, it doesn’t force an EQ curve on your music, but rather evolves to fit the profile of your chosen genre. It can be used on anything from Rock, to Pop, to Classical. You name it Smart EQ can do it.
View smart:EQ 3 on Plugin Boutique
2. FabFilter Pro-Q 3
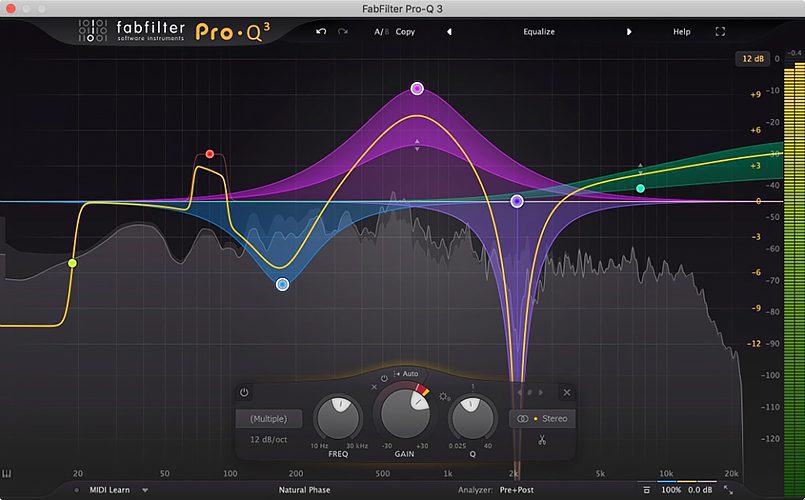
FabFilter is known for its clean, interactive GUI interface across its plugin range. On the frequency spectrum, no EQ parameters are shown. Instead, you simply see a flat EQ curve, fashioned in “FabFilter Pro Q 3 Yellow”, and the grey realtime analyzer showing the incoming signal. Other new features include a ‘brick wall’ filter slope and the neat ‘flat tilt’ shape, which simply rotates the entire frequency spectrum about a fixed point, applying more and more boost or cut the further you get from that point. So whether you want to manipulate subsonic whale recordings or ultrasonic bat noises, FabFilter Pro Q 3 is probably going to work for you.
View FabFilter Pro-Q 3 on Plugin Boutique
3. SplitEQ

SplitEQ is a groundbreaking EQ that offers a fundamentally new approach to corrective and creative audio equalization. It excels at Repairing, Rebalancing, Enhancing, and Widening any musical source or audio signal. SplitEQ is both a surgical tool for fixing particularly nasty problems and a creative tool as it opens up exciting new musical possibilities. More than just an EQ — It’s a new and better tool.
View SplitEQ on Plugin Boutique
Conclusion
In conclusion, mastering how to EQ your acoustic guitar can truly elevate your musical performances. With the knowledge and techniques shared in this guide, you’re now equipped to sculpt your guitar’s sound, making it resonate beautifully in any setting.
Remember, practice makes perfect. Don’t be discouraged if you don’t achieve your desired tone immediately; it takes time and experimentation. Trust your ears and the principles of EQ, and you’ll steadily refine your skills.
You may also like: